
This year, while there is the usual store bought stuff adorning our tree and being given to loved ones, we're trying to also take the time to do handmade gifts and adornments. Although I love her stuff, I am no Martha -- neither the time nor persnicketiness (is that a word? hope so!) to make about 99.999% of what I enjoy *looking* at in her magazine and on the shows. Here, to actually finish projects, we must stick with the more simple ones.
Simple does not have to mean ugly or poorly done, however. I am quite taken with these origami wreaths. There are so many astonishingly pretty papers in the scrapbook aisle these days (not that I scrapbook), so these can be made for pennies in any color one could desire. Last week Michael's had a huge sale and most of their papers were 25 cents each, and I figure that I can make 2-3 out of each sheet, even with a few strips given to the kids to make homemade bookmarks.
They're really pretty simple to make... probably harder to describe making!
A sturdy paper works best, since it will be necessary to manipulate it a bit without it creasing in unattractive ways.
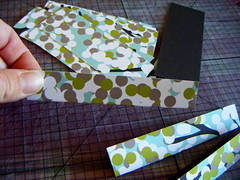

To begin, cut your paper into strips that are about 2 times as long as they are wide. You can make teensy wreaths or huge ones, but too small will be harder to fold precisely, and too large will be, well, too large! I chose 3" by 1.5". When you have all your strips cut, fold them in half lengthwise. If the pattern/colors you want to show are only on one side, you should fold so that the printed side is on the outside. If it's two sided paper, then you have a choice to make. :)
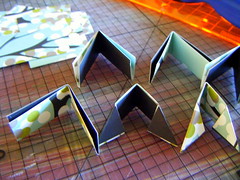
Once you have made the first fold, fold again bringing the short sides together. With the open edges up, bring in each corner at a 45 degree angle. The photo above shows the second fold to the left, then the angled folds to the right.. You need to make 8 of these puppies to complete an entire wreath.
Once you have your little pointy pieces ready to go, it's time to make a wreath! If you look at the open edge of one segment, each half has one little pocket in it. Insert the pointed edges of another piece, one into each 'pocket'.
Now you have two little pockets in the piece to the right.

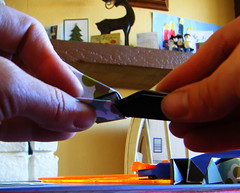
Keep on keepin' on, and insert more segments in the same way you did before, working around in a counter-clockwise manner. After the eighth piece is in place, you need to wiggle everything around to stick the tip of your first piece into it, making a circular wreath. Since it's only paper, and you're not using any glue, there's a fair amount of give.
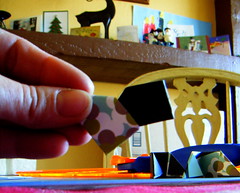
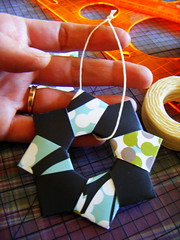 To hang the ornament, you can just loop some twine, like I did, or you might want to be fancier and poke a hole through one triangle tip. Either way, I think they're darling. :)
1 comment:
Those are really cool!
I will post Christmas pics this weekend. :)
Post a Comment